July 31, 2010

Subwoofer integration - worked example 1

Here is a worked example of setting up, measuring and tweaking bass in a typical room.

Update
I strongly recommend that you aim to add bass traps to your room. Not convinced it's worth it? Take the free bass trap test. I have found bass traps make a bigger difference than the EQ shown here, although both together is even better.


The room is 4.65m wide, 3.9m deep with a fairly high 2.85m ceiling. It's lightly constructed with timber floor, plasterboard lining and light exterior cladding. The entire room is like a big bass trap although I've added some extra layers of plasterboard. Unless you have a very big room, you probably won't get much better and if you have concrete and bricks then you may have bigger bass problems than you see here.

So here is the response for the subwoofers:


Green: left sub
Red: right sub
Black: both combined
Horizontal divisions are 8db


Both are in corners and as I sit left of centre there is a different response for each. Combining them makes their midbass gain wider. They both have a dip around 70 Hz and higher up the crossover kicks in. You can see the combined response tracks the maximum output, and dips are not subtractive. You can see towards the bottom end, they tend to combine better. Down there we get about 4db gain from using two subs - not the 6db that is typically predicted. So you can see that two subs don't gain a massive output increase, but provide some smoothing. In this case, if you were to use just one sub, you would choose the right corner.

Don't pay too much attention to the absolute levels. In some cases I had to adjust the levels between measurements. Only consider the levels relative to the other curves in each chart. These measurements were taken for my own experiments, not for this blog post!

Next the main speakers. These were my TL speakers, which I've since sold to a happy new owner. More details on the speakers >


Magenta: left TL
Brown: right TL
Black: combined


You can start to see some benefit here in the mains having bass, rather than simply setting them to small and rolling off the bass. They are a bit flatter where the corner subs have dips. They still have the mid bass peaks, but don't seem to suffer the 70 Hz dip, which would take quite a bit of power to boost.

Notice how they help each other? Two dips around 100 Hz improve and overall we have a result combined that is better than either curve. If we were to see a 1/3 octave smoothed chart (which is more like what we actually hear) then we would see simply a series of broad peaks. In fact these charts show that if we didn't have EQ ability, the mains would probably sound the most accurate. Most would turn off the subs for music and be happy with that.

No smoothing

I prefer to look at unsmoothed charts for bass as they are useful to see what is happening. However, they tend to exaggerate problems and show things we can't hear. We perceive something more like 1/3 octave smoothing, as shown below:


What this shows is that we could use a little boost for the bass overall, and we could smooth out the bass humps a little, but for an in-room result, that is pretty good.

Now, I'll combine everything:


Green: TLs
Red: subs
Black: all combined
Blue: final result with EQ and smoothing - level raised for clarity

Note: levels are not correct!
During measuring, sometimes the levels have to be changed due to clipping. The level of each curve has been manually adjusted to what I think they probably should be.

So you can see the TLs are nice and smooth, but don't give me all the extension I'm looking for as well as bass impact. The subs have this and do pretty well in their range, but the mains are needed to fill in the 70 Hz dip. The black curve shows all combined with the mains running down to 60 Hz - high pass filtering provided there so they go no deeper than I actually need. Then the blue curve shows the final result after EQ has been applied with some parametric filters. I've smoothed only this curve so you can see it as it would sound to the ears (1/3 octave smoothing). I used a number of parametric filters to pull out the peaks and fill in some dips. I've set it up to avoid the dips being too bad.

Conclusion

With all these four bass sources now combined and calibrated nice and flat, the result is better than I could achieve with any of the parts on their own. What you can't tell from these measurements, is that the bass has more brute force than the mains are capable of, yet the subs are more articulate than they would be if set up without this kind of attention. Desipte being very capable and accurate they could in fact sound fat and bloated through no fault of their own, simply due to room effects. When trying to do this by ear, you end up with an inferior result. You end up changing the volume. You will hear music that hits those peaks and set the level based on them, but at other points the bass is missing so you turn it up. You end up with an unhappy compromise with less bass than you want at times, due to turning it down to try to tame the peaks. The final result that you see here combines the best of both the TL mains and the subs. The subs add impact, extension and force without making the bass less accurate.

Where do I go from here? I hope to get a flatter response still prior to EQ and add headroom to all the bass sources, with my new mains with some Acoustic Elegance woofers and horn loaded versions of the subs, along with a third tapped horn for the very low frequencies.

Equipment used:

Behringer ECM8000 measurement mic
Behringer Xenyx 502 mixer (preamp mic)
Room EQ Wizard software

More about a simple measurement setup >

It's also important to note that in my room, I have two critical seats and they measure almost identically. In many other rooms this won't be the case, and more measurements are needed.

Glossary

Confused about audio speak? Here are some terms I keep using, it's a work in progress.

Room modes
In a typical domestic sized room, the bass response is lumpy - it has peaks and dips which are the evidence of "room modes." They are points in the room where the bass is stuffed.

Shroeder frequency
This is the point above which room modes are spaced so close together that they smooth out and the room no longer causes irregular peaks and dips. This usually occurs around 200 Hz.

Can you simulate room modes?

There are a few different tools to simulate room modes. Are they useful? Let's find out.

Here is a measurement of a subwoofer in my room. It's a nearfield measurement, just to show you what the subwoofer is doing.


You can see the measurement is very smooth so far, and the small peak above 160 Hz is a measurement artifact.

The sub is a Rythmik servo sub:


Next I'll attempt to simulate the response of the room using the FRDC Room response calculator.


Subwoofers are placed in corners, and the "mic" in the listening position. The program assumes perfect response from the subwoofer - totally flat over that range.

Here we have two versions of the same room. One is built like a concrete bomb shelter (no damping). You can see we get narrow dips and peaks with no damping. The other has damping such as we would find in a room constructed more lightly - plasterboard walls, timber floor, etc.

Now let's look at an actual measurement:


At first glance it looks quite different, and it's tempting to dismiss the simulation. Firstly, the room gain appears to be exaggerated in the model. We can see 3 main dips in the measurement - 70, 100 and 150 Hz and these are reflected in the model to a degree.

Conclusion

Are the simulations accurate? As you can see, it's a bit hit and miss. You can't rely on them fully, but let's suppose I gave it some more time and fiddled until I came a bit closer to the measurements. I could use different values for how much each room surface absorbs. I could then use it as a tool to quickly show the impact of different placements quickly. That has some value, but it certainly won't replace measurements. You will need those before you can be confident in your results. If you are hoping to use this tool to design a room before construction, I would use some caution.

July 21, 2010

Bass horn room integration

There are two aspects of integrating a bass horn. One is a practical challenge of fitting it in your room physically. The other is acoustically getting it to work in your system and room.

Room loading

Ideally a bass horn should load into a corner. That allows the horn to be smaller as the corner becomes an extension of the horn. In an extreme design where the horn mouth takes up an entire wall, the horn sees more loading than a corner so the walls can become part of the horn.


If you create a raised stage as shown below, then you have a mix of loadings. Horizontally it sees more loading than a corner horn, but vertically it sees halfspace loading. A rough guess would be to treat it as half way in between - quarter space loading.


What is all this space talk?

Put a bass horn up in the air and the bass radiates in all directions. We call that full space. Put it on the ground and we've cut that in half so it's called half space. 6db acoustic gain in theory results, less in practice due to transmission and absorption through the enclosure. Add a wall next to it and we call it quarter space as the radiation is divided in half yet again with 6db more gain. A corner adds another wall so we call this eighth space. So if you took the bass horn seen above, which we will describe as quarter space, and loaded it into a corner it could be half the size. We could cut the platform in half and turn it up on it's side on the right or left wall running floor to ceiling. It would do the same job, although it would destroy summetry. Another option would be to extend the front wall which has the screen. The horns would each fire into the corners and not be quite as wide as the room. Which option is preferable depends on the room dimensions.

Room modes

It's important to keep in mind that while a bass horn can be an ultimate solution, it may require more bass sources to even out room response. Generally corner loading is needed and there may be a need to add a few more bass sources to get a smooth result. Typically you will see peaks and dips in the response and extra subs can fill in the dips, then you can use EQ to remove the peaks. So it should be kept in mind that a beastly bass horn won't give you perfect bass.

Measure your room

Before you build a bass horn, measure the room. You'll need a bass speaker which can play low enough to see what you are dealing with. Measure it with the mic right up to the cone, then measure the in-room response. That way you can see what the room is doing to the response. Imagine if you put a corner horn and get a -15 db dip at 60 Hz. You will give up all the headroom gained if you boost the dip.

Combining subs

A better idea is to measure the entire room, then place another sub so that it will remove the dip. You might get creative with positions and consider a coffee table subwoofer. You might also use a combination of front loaded and tapped horns. A TH for deep bass extension, then a midbass horn extending where it leaves off. You might add a smaller sub in a closer position to fill in some dips.

3 bass horns

There are three basic types of bass horn:
  • Front loaded horn (FLH)
  • Back loaded horn (BLH) - sometimes referred to as a scoop bin
  • Tapped horn (TH)
Conventional horns are either front or rear loaded, as shown below:

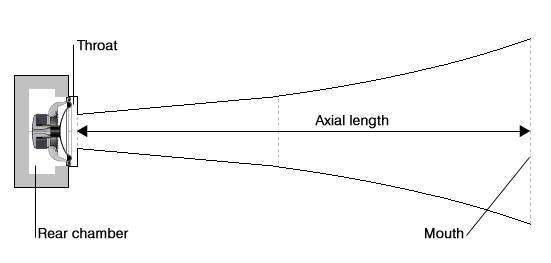
Front loaded horn

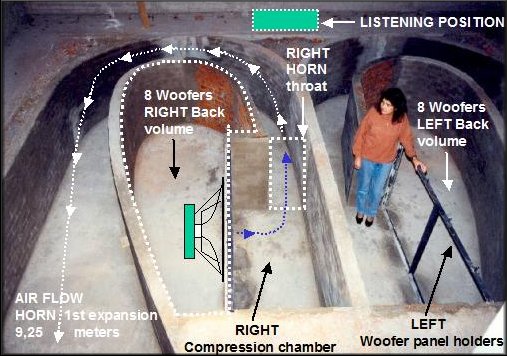
Back loaded horn

The only physical difference in theory is the rear chamber. A front loaded horn is the best choice for efficiency and accuracy with limited bandwidth woofer or subwoofer applications. The sealed chamber helps with controlling the behaviour of the bottom end. It restricts cone motion so that the cone is loaded on both sides - behind with the air spring from the chamber, and in front with the mass of air on the horn. This causes the driver to perform in a more linear fashion than if loaded only on one side as a direct radiator.

A back loaded horn lacks the sealed chamber and so may require a high pass below cutoff to protect the driver. The sound from the rear of the driver causes cancellation and is problemmatic. However, a back loaded design is appropriate for a wider bandwidth and some drivers are made for this type of design. If you see a 15" pro driver with 100db sensitivity or higher, and an early drooping response, it's probably intended for a BLH where the horn brings the sensitivity up. Some full range hifi drivers perform well in this type of horn.

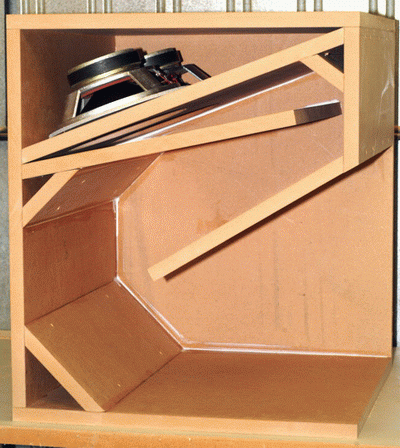
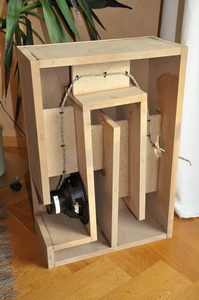
A tapped horn is very different. There is some debate whether it should be classed as a horn and many have described it as a bandpass or transmission line. While there are similarities, there are also differences so I consider it best to simply accept it as a special type of horn with it's own set of characteristics.

A tapped horn can achieve high efficiency but is even more difficult to design. The size is smaller and they can as a result be used practically for a lower cutoff. Often the bandwidth is less than a conventional horn and many drivers don't suit a TH. The response is also peaky.

The best of both

Tapped horns and conventional horns can work together well. Start with a tapped horn for the bass and it will provide as much extension and low frequency output as you want, but over a narrow bandwidth. You might aim for 15 - 50 Hz for a home theatre system or 35 - 120 Hz for a music system. Then you can cross to a FLH which can now be much smaller. Ideally the TH would have more power and a driver with more excursion, and the FLH would use a driver designed for midbass efficiency.

Bass horn SAF

Let's deal with the biggest challenge first - spouse approval. A single guy can build a bass horn as big as he wants, but most audio enthusiasts have to get it past the interior design committee. So for most a bass horn seems out of question. Anything bigger than a tissue box is sometimes met with "can't you make it invisible?" I have some suggestions that can make your wildest bass horn fantasies come true.


Image source >

Are you a home owner?

If the answer is yes then you have a lot of options. A bass horn needs to be attached to the room, but it doesn't have to be in the room. One way to do it is build a false wall and if building from scratch you might allow for this. Or you could build it very much like a fireplace where the chimney is the same width as the bottom part. This could work in a big room.


Image Source >

Consider every surface in the room - ceiling, floor, walls. An attic could become a bass horn, although construction is a challenge. Subfloor space is also possible if you have a timber floor. Unused cupboard space in an adjacent room? Many options here.

Covert subwoofers

If the above aren't options, there is no need for fretting and frustration, here are some alternatives. Firstly, a covert subwoofer. Let's face it - every home has big items that we all accept because we realise they have a function that makes size an issue. Cars, fridges, freezers, Air Conditioners, Heaters, fireplaces, computers, pantrys, wardrobes, built in ducts, dining tables, benches, couches, coffee tables, buffet units, fish tanks. All these are space hungry consumers but how often do you hear of men complaining their wife won't let him have a big fridge?! So the solution for some can be to build a fish tank subwoofer!

Can you make it look like a piece of furniture? Or can you make it look like part of the room? You might build a false wall subwoofer. It simply looks like a part of the room, same paint as the walls, and even a skirting board. It does not need to be actually built in.

Two approaches

So there you have two approaches that could work quite well, depending on your situation. Obviously it won't work for everyone - a lot of rooms don't allow any kind of bass horn and some partners won't come around to the idea of a bass horn. Still, there are a lot of would-be bass horn owners who simply need a new idea. And even if your partner is fussy, you might even be able to work together on something together.

Bass horns online

First, the biggest bass horn in the world:


The most powerful:


Danley Matterhorn. This is a tapped horn with 40 high excursion drivers and 40kw of power. Designed for military use where 105db is required outdoors at 15 Hz one quarter of a kilometer away! The US military approached Tom Danley when they weren't able to meet their target with a sub that fits into a shipping container.

One of the more stylish options:


Avant Garde >

Now let's come back down to earth. Here are some designs that you could actually build and use in a domestic room.

William Cowan sub jr

http://www.cowanaudio.com/hornsubjr.html


Volvotreter.de

http://www.volvotreter.de/th.htm


Compact and large tapped horns


Speakerplans.com

Here you will find a range of horns designed for pro use, as well as bandpass designs.

http://www.speakerplans.com/

Lab horn

This is a diy favourite intended for pro use designed by Tom Danley. It uses the Eminence Lab 12 driver which was designed for the application. Some have had good results for home use.

Pro sound web info >

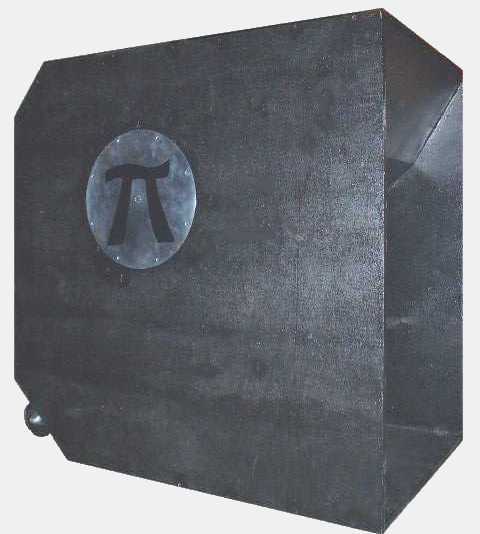
Pi Speakers bass horn kit


http://www.pispeakers.com/Products.html


This is a commercial subwoofer that is based on the Lab horn - essentially an improved larger version.

Vincent Brient straight bass horn

30 Hz straight horn >