April 30, 2011

How to design an acoustic diffuser panel

The information here will help you quickly design your own. You may prefer to simply build from a dimensioned plan, however, persist with this quick guide and you will soon have your own custom version that can be sized for your own requirements.

Diffuser primer >

1. Download QRD calculator >

This is a free application that makes it easy.

2. Choose the number of wells for each module

3. Choose either the depth or the lowest design frequency

Choosing one will determine the other. The region above 1k is critical for imaging, hence it is a good idea to aim for your panel to operate to that point at least.

4. Check the listening distance

5. Check the fin width

6. Decide on 1D or 2D

If your panel is 2D then click 2D from the top menu.

Now you have all the information that you need. Grab the calculator and work out how much material you will need. 3mm MDF would work well for the fins, but for the wells you may choose something a little thicker to make it easier. Keep in mind that if 18mm MDF is used, the panels will become heavy and more difficult to mount.

For more information, read the guide written by Collo, who designed this free application.

Diffuser panels: why you need them and how to make your own

An acoustic diffuser is generally more difficult to design and build, hence more expensive. They are also a little more difficult to integrate into a room. In the average room they are a rarity, but are often seen in high end rooms and recording studios. Do you really need one in your room?


Diffusion vs Absorption

An acoustic absorber simply absorbs sound waves and such a panel can be placed anywhere it is needed to reduce the overall room reverberation and address the most damaging reflections. In many domestic rooms, a point is quickly reached where the room begins to sound dead. Diffusers can be used to address problemmatic reflections without absorbing their energy. Instead, an incident sound wave is dispersed equally in all directions. This has two effects; the first is that a strong first reflection is reduced and the second is that the energy is redirected so that it remains in the room but the sound arrives later and at a lower level, having travelled a longer path. A further benefit is that a small room actually sounds bigger when treated with diffusion, while a room treated only with absorption tends to sound more controlled until it becomes dead.

Placement considerations

Absorbers can be placed anywhere in a room, but diffusers are subject to placement rules.

1. Minimum listening distance

Diffusers become ineffective at close range. The minimum distance depends on the specific panel. Often 1m or more will be required, but where a listening position is close to a wall behind, a low profile diffuser may allow a distance of 0.5m.

2. Diffusers have more impact when the path of relatively early reflections

If sound waves have reflected off multiple boundaries before reaching the panel, their impact will be reduced.

3. Diffusers have a limited effective bandwidth

Based on their geometry, an upper and lower limit is established. One typical example would be a 150mm deep diffuser with an effective bandwidth of 1 - 7 kHz.  One octave below it becomes progressively less effective and below about 500 Hz, sound waves will behave as if reaching a flat wall.

4. Don't overdo it!

There is such a thing as too much diffusion, and it's likely to create imaging confusion!

Types of diffusers

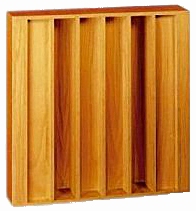
Most diffusers are either 1D or 2D. A common example is the QRD (Quadratic Residue Diffuser). It is popular because it is one of the simplest. A 1D QRD is the very simplest, and works in one direction.

In this example, an RPG unit is shown. Diffusion occurs horizontally. If rotated 90 degrees, it would work vertically.

A 2D QRD works in both directions.


Quite similar is the Skyline diffuser, which is essentially the same thing without the grid.


Confusion over diffusion!

There are some panels that are confused with diffusers, when in fact they could be best described as scatterers. Panels that feature curves or small pyramids are not true diffusers. Curved panels simply create more specular reflections. They are like a curved mirror, while a true diffuser is more like a matte painted wall.

The unfortunate aspect of this is that panels that aim to look more artistic will tend to compromise their performance. Repeating panels and designs based on equations yield the best results. 


Mixed panels

Some products include absorption as well as diffusion. Real Traps diffusors are filled with rigid fibreglass so that they transition to absorption below their effective diffusion range. This means they add a small amount of bass trapping, so if enough is used, the bass performance will also improve. Other products also aim to absorb over a wider bandwidth.


Do you want to design or build your own?

An acoustic diffuser is an ideal DIY project. They are easy to design. Design your own >

More about Diffusers >

April 29, 2011

Bass trap couch

Can a couch also work effectively as a bass trap? That depends partially on where it is placed. If in the middle of a room, it isn't likely to be very effective. However, if you are in a small room where you are forced to place the couch very close to the rear wall, then it can work quite well as a bass trap. A couch is a fairly large area of a foam near the floor to wall junction. You can make it more effective by putting foam between the couch and the wall, and foam that fills in the space between the couch and the floor. The difference is shown here:


Comparing the two it seems that peaks and dips are changed. Not all the changes are an improvement. The dip just above 100 Hz related to boundary interference is made effectively worse, but this is mainly because it remains while the level comes up on either side. Minor dips are added around 150 Hz, but the peak and dip higher up are both smoothed out. 

Overall I'd call it a slight improvement and some improvement in the decay time is also seen. This is a good result, especially considering that no extra space is taken up in the room. A single foam mattress was placed in between the couch and wall. Most of the improvement is in the lower midrange, above 80 Hz.

Do small foam traps actually work?

The short answer is NO! Small foam "bass traps" achieve very little. Foam traps must be oversized in order to be effective, because foam isn't the ideal material. If you put four foam single bed mattresses in four vertical corners, you would get an acceptable result, but the 1x1ft foam wedges sold as bass traps are well short of being enough. Shown below is what I call a "minitrap" which is about 0.3 x 0.3 x 2m in size, placed in a corner.


Here you can see the response is virtually identical. When bass trapping is adequate, we should at least see the Q of the peaks smoothed out. 


The waterfall shows a more complete picture. Again it confirms no real improvement. A great deal more trapping is required. Grey is the empty room, green is with the minitrap.

April 25, 2011

How does the bass of speakers combine in a room?

What happens when you combine the bass response of two speakers? I'm referring to their real-world behaviour that you hear from your listening position, when all of their room-related peaks and dips are combined together?

We expect the bass level to be increased by 6 db. Do we actually get this much increase?

Do the peaks and dips average out? Or do they combine in a more complex way?

This chart shows two subs measured individually, with an average calculated response. This isn't the same as what you will measure if you measure them together. The response doesn't average out like this.


Peaks sum together. Dips don't subtract. Responses don't average peaks and dips. Where phase interference doesn't occur this will hold true and the combined response will be equal to or greater than the sum of all peaks.

Here you can see the measured response of two subs - left (green) and right (red) and the two combined (black). 


The shaded regions show where the left sub has a lower level (shaded green), or where it has a higher level (red). The combined response more closely matches that of the right sub where it is higher. The most obvious deviation is the peak at 44 Hz where the left sub has higher output. Below 25 Hz the behaviour changes and room gain appears to have some additional influence.


At the upper end of the modal range, we see some patterns more clearly. Here the combined response tracks that of the louder right sub even more closely. The dip at 100 hz remains because both subs have it, however the combined level is the lesser of the two. The dip around 140 Hz is eliminated completely because the flatness of the right sub dominates. The sharp dip at 160 Hz is also ignored as is the response of the left sub from 200 - 300 Hz where it is much lower in level.


In general, we can conclude:
  • dips are not subtractive - they can be removed by adding another bass source that doesn't have the same dip
  • peaks sum together
  • the combined response of two bass sources is generally not an average, but it is more like the combined maximum level of the two
This has some implications in bass integration. The one that is of interest is that dips can be removed by adding bass sources together. These dips are best removed in this way rather than trying to use EQ. Bass traps are generally ineffective here.

Here is another example:


You can see the sub has a dip that the mains do not. The solution is to overlap the responses of both. So rather than crossing at 80 Hz, in this particular setup I ran the mains down to 60 Hz with a high pass at that point. The mains could in fact easily extend down to 23 Hz, however there was no need.

April 24, 2011

REW measurements - TL speakers and Rythmik Subs

This one is digging into the archives for some measurements of my TL speakers shown elsewhere on this blog. They were combined with Rythmik subs. 


Looks pretty good doesn't it? This is showing a smoothed chart of my subs and TLs combined with some PEQ to get them flat. 1/3 octave smoothing approximates what we hear, but does it hide problems?

Here is the unsmoothed version. As you can see, it's also pretty good. No real problems hidden here.


What really reveals problems is the waterfall:


The steady state response is fine, but the waterfall shows considerable modal ringing. Bass traps are needed.

This is what I get with bass traps:

The steady state response isn't perhaps quite as flat in places, mainly due to spending less time on EQ in the dark green version. There are quite a few things different (speakers and crossover settings), however the critical thing is room treatment. The bass traps make a world of difference. The real achievement in the last chart lies in getting a shorter decay time. Subjectively it's a dramatic improvement.

April 23, 2011

An afternoon with Adam Speakers


Adam are one of not too many speaker manufacturers who make active speakers for home use. I paid a visit to the home of one owner to have a listen and help with taking some measurements. I had heard these speakers in this room before and this time they left a different impression.

The first time around, they had a forward and precise sound. Out of curiosity I had a look at the rear panel controls and noted that the treble had been turned up - that explained the forwardness of the presentation. This time they were quite a bit more mellow and the level had been reduced by 2db shy of flat, which turned out to be a nice balance.

Never heard of Adam speakers?

Adam professional audio >

They make both home audio and studio speakers. The speaker in question here is the Tensor Delta. It has a 9" woofer combined with a Heil mid and tweeter. They are driven by built-in class D amps and a class AB amp for the tweeter. What you can't tell from the website is how well finished they are. The finish is pristine and the build quality exceptional.


You may notice some foam behind the speakers. I brought some along as temporary "bass trap reinforcements." You can see one of the existing bass traps in the corner on the left. We took some measurements with Fuzz Measure and in the waterfalls we could see some improvement with the four added foam scrap traps in the corners. They are not nearly big enough or the right material to fully trap a room, but they were enough for us to see a difference in the measurements.
We took some gated measurements at 1m in less than ideal conditions with boundaries a little too close. Ideally one would elevate the speaker to a height of 1.8m outdoors and gate out the first reflection from the floor. We didn't quite have the space or time so we did a "cheat measurement" using foam to damp the nearest two reflections as shown. This allows us to measure to lower frequencies. We took a series of measurements, including nearfield, farfield, and gated @ 1m.

The nearfield plots revealed a very smooth and flat response.

This isn't the normal way to measure speakers, but it is more common for a subwoofer. I took a nearfield measurement of the woofer, but the other drivers were measured that way out of curiosity.

One thing that was demonstrated was the way in which having less bass can make a speaker "room friendly." For a stand mount, these are certainly bass capable. While the room has not been tamed with extensive EQ or bass traps, the owner had turned back the bass a little to compensate. On most tracks this resulted in the bass sounding well under control.

April 18, 2011

Speaker placement guide

Speaker placement often doesn't get the level of attention it deserves. That is a shame because it is free! The difference between good and poor setup here is greater than many expensive upgrades. The most common mistake is simply not taking the time to try different options and pay careful attention to the changes.

One size doesn't fit all

Speaker placement is a juggling challenge where you have to consider the interaction between various factors. The theory offers starting points, but the best option, if there is such a thing, involves a chaotic interaction between various aspects. In other words, I suggest a mix of theory and trial and error with careful listening. The kind of listening that is required for this is not a general listen to "musical engagement" but it's about paying specific attention to the impact of each change.

Specific attention

As you try the different options, listen critically and carefully for the changes. The key is in paying attention to certain cues.

Different rules for different speakers

Many placement guides assume conventional hifi speakers with a small dome tweeter and 4 - 6" mid. However there are different requirements for different speakers. Panel dipoles, open baffles, omnis, horns and waveguide speakers all have different requirements.


1. SBIR - Speaker Boundary Interference Response.

You have 3 distances from the woofer to the floor and the 2 nearest walls. Try to keep each of those different. More >

2. Toe in

Start with the speakers firing direct at your centre listening position. Try angling in or out a little either way. In doing this you are adjusting the tonal balance slightly, and also side wall reflections. Toeing them in a bit more will reduce side wall energy slightly. It will also affect how the sound changes as you move to either side of the centre position. If you toe in with a greater angle, then as you move to the left, the closer speaker is angled further away from you than the farther right speaker. It can make the sweet spot a bit wider. The dispersion of the tweeter is a factor.

3. Speaker distance - lateral


The further apart, the wider the sound stage, but as you get too close to side walls you lose the benefit, so you have to juggle. The closer they are to the walls, the stronger the reflections will be.

4. Speaker distance to listening position


In a small to medium room you have to do what you can to maximise it as you often end up listening too close to get a sound stage developing. I'd think 3m on the diagonal is a good distance. Make it too close and you get a nearfield type of sound where the stage doesn't fully develop. You get less room sound but the lack of a sound stage is unnatural. Make it too far away and the speaker gets swamped by the room.

5. Direct to reverberant ratio


This is the ratio of direct sound from the speaker only (such as you would hear outdoors) to the sound that comes from the room. Nearfield increases direct proportion, placing the speakers in room corners and listening against the back wall is the other undesirable extreme. Every room has a balance in the middle you try to find. You want the sound stage to develop, but also to have a natural balance of room and speaker sound together.

So your task is to put all these things together and find what works in your room. You need a bit of trial and error and some time to listen carefully. It's not a bad idea to break some of the rules, like putting the speakers in the corner, just to hear the extreme version of getting it wrong. If you are stuck in a small room and it's hard to get enough distance from the speakers, then you can push the speakers closer to the wall than ideal, and tame the artifacts that creates with some treatment.

The key is to try things out and to carefully pay specific attention to these things. I've seen a lot of setups where the speakers weren't placed very well. I think it comes down to not trying things out, and not paying attention to the specific issues. When you toe in, pay attention to what happens to the sound as you move laterally (side ways). Also pay attention to the tonal balance, as you will get a change in the treble especially. You probably want to be close to listening directly on axis, so you get the same sound from each speaker. As you adjust the offsets from boundaries, pay attention to the lower midrange area, because you will be adjusting peaks and dips there that come from SBIR. Another step is to get a basic measurement setup and you can actually see it.

Also move forward in front of your listening position and see what happens to the sound stage. Moving closer you get a nearfield sound.

The next step is a little acoustic treatment - that is another adventure!

Bass measurement update


A recent in-room measurement showing how effective the bass traps and EQ combination is. You can see a minor peak around 44 Hz. I have a major mode there, and a little more attention to getting the EQ right would bring that down. The consistency of the decay and the damping of modal ringing is the thing to note. For those not accustomed to looking at such plots, this is a very good measurement.


April 14, 2011

Big speakers in a small room

Question: 
Can I put big speakers in a small room and still get good sound?
Answer: 
Absolutely! It can be done, but there are a few factors that determine how effective this may be. 


From time to time you may hear things like "they're a great speaker, but they do need a big room." The next guy says "hell yeah, you don't want 'em in an average room, it wouldn't work." It's almost said as if self-evident truths are being shared. I used to hear comments like these and wonder why, half the time suspecting a solid reason didn't really exist. I have since learnt a few key issues that will determine if a speaker can work in a given room effectively. Firstly, let's dispell one myth - physical size alone tells us nothing except whether it will fit in the room and whether you can get it past the interior design committee.

So what does actually matter? There are a few critical factors involved.

Output capability

Bigger speakers tend to have either more bass extension or more output, or both. There are exceptions of course. A smaller speaker designed with limited extension for HT may have more output than a big speaker designed to go down to below 20 Hz. 

The output capability is determined by a couple of factors:

1. Sensitivity - rated as decibels measured at 1m with 1w input. Voltage sensitivity is often misleading and speakers are often not rated correctly.
2. Power handling. This is another misleading rating because nominal ratings often tell little of the real limits of a speaker.

Often the specs provided will mislead those who aren't able to judge if they are actually correct. In addition, the real world useable output is often less than expected. Many speakers will have a real world maximum output that is near the sensitivity rating of the speaker. In other words, many speakers rated at 90 db sensitivity will achieve about 90 db at the listening position in a typical setup.

However, if you are comparing speakers, these ratings if specified honestly will offer a guide. As a general rule, an output target is more likely to be achieved with high sensitivity rather than high power handling. The latter is limited by power compression, in which progressively less power is delivered since increasing levels are lost in heating up the voice coils of the drivers.

Bass integration

The way in which you intend to get the bass to work is crucial in this decision. Small enclosed rooms tend to have more bass gain. This is an acoustic boost that can make the bass sound boomy and exaggerated. In every room you also have room modes. It isn't unusual to have a big peak around 40 Hz with around 15 db of gain. A speaker with strong output there will sound boomy unless this effect is tamed. A speaker that has already rolled off at 65 Hz will simply gain some free extension but should not sound boomy.


Above: This speaker looks good before the room mode peak is included - then it looks ugly!


Above: This speaker appears very unimpressive until the room is considered. The rise at the low end will make the bass sound fuller, but it will not boom.

If you want an easy job of integrating a speaker into a room where you know there is a lot of gain and modal peaks, speakers with early roll off may make the task easier. My own preference is to arm yourself with more firepower than needed, then control it with bass traps and EQ. The result is greater headroom and accuracy. However, there are many that will be happy with the result of a more modest approach.

Vertical driver integration

Big speakers with very large distances between drivers sometimes require a certain listening distance for the drivers to integrate. Try listening up close. You hear separate sources, tweeting from the tweeter, woofing woofers, all that stuff. No sound stage. Move back and they start to integrated into a cohesive sound. At one point they are "nearfield" in that the speaker dominates the sound, not the room, but there is no sound stage. At a certain distance, the image floats into the room and you have the illusion of someone in the room singing at you.


The worst case scenario is a big horn speaker with a super tweeter coming in at 8k, being 1m offset from the mid vertically. That tends to mean a big room!

There is a bit of a rule of thumb here - the actual vertical offset is only relevant as far as it relates to the wavelength at the crossover point. You can have a big offset with a low xo point. The idea is to cross at 1/4 wavelength regarding vertical (or radial) driver to driver centres, but it's an ideal almost never achieved. A more common compromise is one wavelength. You can work it out

Distance in metres = 344 / frequency --- (1 wavelength)
Distance in metres = 344x4 / frequency --- (1/4 wavelength)

So let's say you have a Mini Monitor with a 1" dome tweeter and 5" mid and you know the xo point is 2.5k. The max distance apart to keep to the rule is 2500/344 = 138mm. That just happens to correspond to the typical offset between those drivers. It passes the rule. Now let's make the mid 8" in size and lower the xo point to 1.8k. Does it still behave?

Let's transpose .... f = 344 / D = 1.9k ... the answer is yes, we can cross as high as 1.9k anything lower is fine.

To satisfy the 1/4 wavelength rule, we'd like the crossover to be at 490 Hz - obviously that isn't going to happen!

All of this is behind my next project - a point source horn. It's huge in physical size, yielding around 100 db sensitivity compared to a more typical 85 db with conventional hifi speakers. Despite it's large size, it's a clever design that places all drivers within 1/4 wavelength apart. Not too many designs can pull this off.

So if we have a mini monitor and a big speaker with a 12" mid and horn, how do they compare? The mini monitor probably lives within the 1 wavelength rule, let's see about the big speaker. We'll say it uses a horn that is 12" across and 5" vertically. Vertical offset is 0.22m, therefore the crossover should be 1.6k. I would have it cross at 1.2 - 1.5k, so it can easily satisfy the rule, in fact more easily than the mini monitor. In that sense you might say it is acoustically smaller than the mini monitor.

Directivity


This is the one that gets ignored. The smaller the room, the greater the need to control directivity to get good sound. Smaller rooms will tend to have a more coloured sound. Generally, size is needed to control directivity. In that sense, the 12" horn speaker can give us some control over dispersion so the room colours the sound less. A small speaker in a small room will have wide dispersion, suggesting we need treatment, but then the room quickly becomes dead. We have a problem.

The audiophile mouse wheel

Warning! This post is likely to offend some readers. (Which is precisely why some of you want to read it!)

In case you are wondering, no this isn't about toys for your pets but toys for adults. Here you have a nice toy to keep your pet occupied in a confined space, giving him something to do without moving ahead. Keep that phrase in mind, because it sums up many things that keep audiophiles busy.

The question comes up all the time on audio forums. Should I bi-wire my speakers? I have spare amp channels, should I bi-amp? Should I buy the quantum transfigurundem premorgifier? The quantum part makes it sound like they have a basis in real physics. Should I stick lots of little dots on my audio components?

All of these are symptoms of a desire to get somewhere, but all of them will leave you confined to your current limits while expending effort and spending money. No doubt you've read comments from within the confines of many mouse cages, full of subjective descriptions of the improvements, many of them simply describing the changes you get when listening to the same thing expecting to hear something different. The brain is very good at revealing new information that was always there. Have you ever seen a word that suddenly looked as if it were spelt incorrectly? Music is like a mysterious woman you can never fully know, always presenting something new even after familiarity has stopped you from noticing.

Personally, I prefer to do the real tweaks. The kind of changes that your dog can hear from outside without really paying attention. If I had a dog, and if he could talk, he'd say "wow, woof woof, those woofers now sound so tight and musical, I might be out of a job soon. Are you trying to replace me?"

So if you are looking for those kinds of tweaks, you'll find some sign posts in here.

April 6, 2011

DIY preamp revamped

After my DIY preamp failed, I decided it was time for a re-vamp.
  • new box
  • new RCA terminals 
  • new wiring
  • upgraded opamp
This preamp is based on the Elliot Sound Products P88 board

The case

After investigating local and international options, I opted for the economical 2RU rack mount case which was on special at Altronics


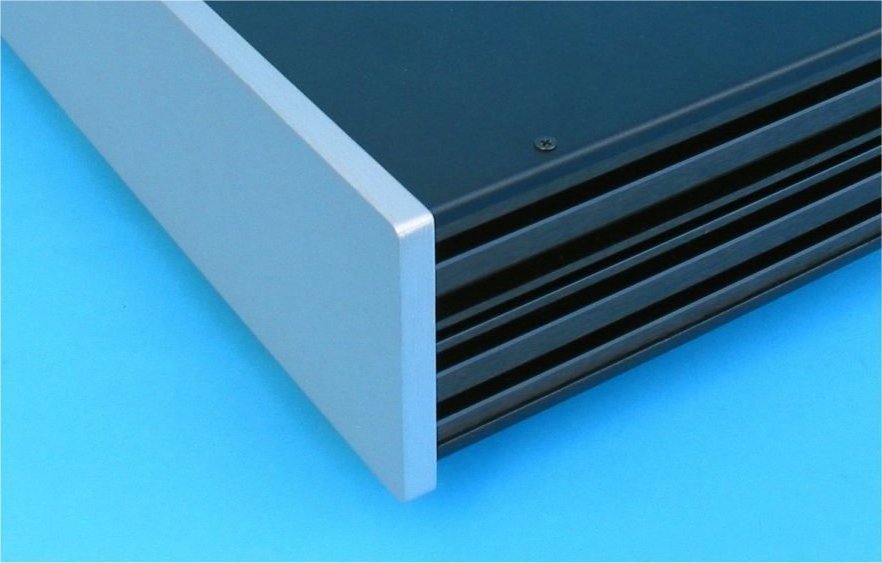
While it is a low cost option, I've found it's quality to be very good. The case requires assembly but is very simple. The case is steel, with a brushed aluminium front and an aluminium rear panel. My only complaint is that the rear panel has a gloss finish which looks a bit cheesy. After drilling all holes I decided to spray the enclosure (bottom and rear panels). This brought the rear back into a matching finish.

I also considered some impressive cases from Modu in Italy.


The cost was quite a bit extra, however, they are actually cheaper than most local options even where the local options are very plain rack mount cases. My plan is to conceal my equipment in a rack, but if I were planning something more visible, then the extra cost would be worthwhile. 


The layout allows for the addition of other parts in the future. I may add a remote volume board and possibly also a DSP crossover. As you can see, I prefer a minimalistic exterior. The front panel has nothing more than the volume knob. No LEDs or power switches. The balance control has even been placed on the rear. 

Previously I had a working remote volume control board. Unfortunately one mistake with the power supply wiring destroyed it! I have drilled the holes for the board, just in case I manage to get it going again. Being a steel case, I prefer to spray it so there is no bare metal.

Since opamps were installed into sockets, they can be easily removed and changed. I originally used TL072, but have since upgraded to Burr Brown OPA2134, which is an opamp preferred by many. 


You may notice two sets of switches, each with 4 individual switches. These set the gain. It is very useful to have a choice here.

The original preamp failed due to a faulty toroidal transformer. I had it tested by a friend who knows a great deal more about electronics than I do. He informed me that the transformer was faulty due to a manufacturing issue. I needed only to replace one fried resistor, a fuse and the transformer to get it working again. Rather than opt for another of the same transformer, I decided this time to go for a different type. 


Heatsink overkill? Probably! I have seen many voltage regulators with no heatsink at all, and those with heat sinking are usually small. My excuse is that I was just following the instructions!

How does it sound?

I had thought that preamps are all very transparent. When this one failed, I replaced it with the preamp in an old Akai integrated amp from the 80s, back when Akai made half decent hifi components. The difference was immediately apparent as a backward step. There was a change in tonal balance, such that I had to redo my crossover and EQ settings. My DIY preamp here is far more transparent in comparison. It has no noticeable sound of it's own, but is clean and transparent. There is no more that I can say. It simply does its job and gets out of the way.

April 2, 2011

Deluxe e-wave

Finally a chance to hear the Ewaves with foam for the 12" oblate spheroid waveguide. Measured response shown below:


While this is a REW plot, it is actually gated (yes - you can do it with REW).

Initial impressions are quite good.